Create and Submit a WordPress XML Sitemap to Google Webmaster Tools is very important and necessary. With a sitemap, it’s much easier for the crawlers to see the complete structure of your site and retrieve it more efficiently. This will increase your site rank in keyword search result.
Google is the best search engine and search for new quality contents and index them. To improve your indexing speed for new content you create, there is a feature within your Google Webmaster Tools account that allows you to submit a Sitemap URL to Google. This allows Google to index ALL pages and posts on your website and to do so in a very efficient way.
More web pages ranked = More traffic = much more benefits
In this post I am going to teach you through the process of creating an XML sitemap using the Google XML Sitemaps plugin in WordPress. After you have done that, you will be able to submit your Sitemap URL within your Google Webmaster Tools account. Your WordPress site will be getting indexed quicker and ranked.
﹟1. Install Google XML Sitemaps plugin in your WordPress site
Google XML Sitemaps is a well-know and most popular plugin and can generate a special XML sitemap automatically. It will help search engines like Google, Bing, Yahoo and Ask.com to better index your blog. The plugin supports all kinds of WordPress generated pages as well as custom URLs. Additionally it notifies all major search engines every time you create a post about the new content.
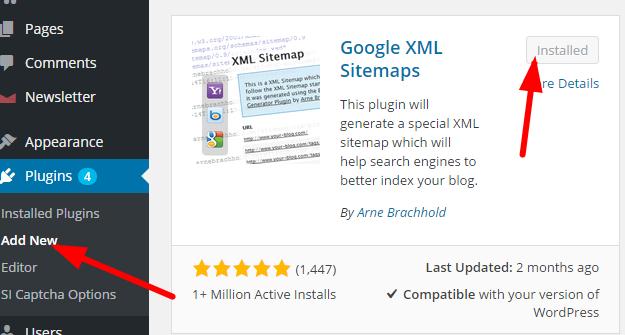
Now log into your WordPress background and check the plugin box, you will see “add new” button. In this area, we search the keyword Google XML Sitemaps to find it and click “install now”. After installing it successfully, don’t forget to active it. ( see imagine below)
Or you can download here and install into your WordPress site later.
﹟2. Creating your WordPress XML sitemap
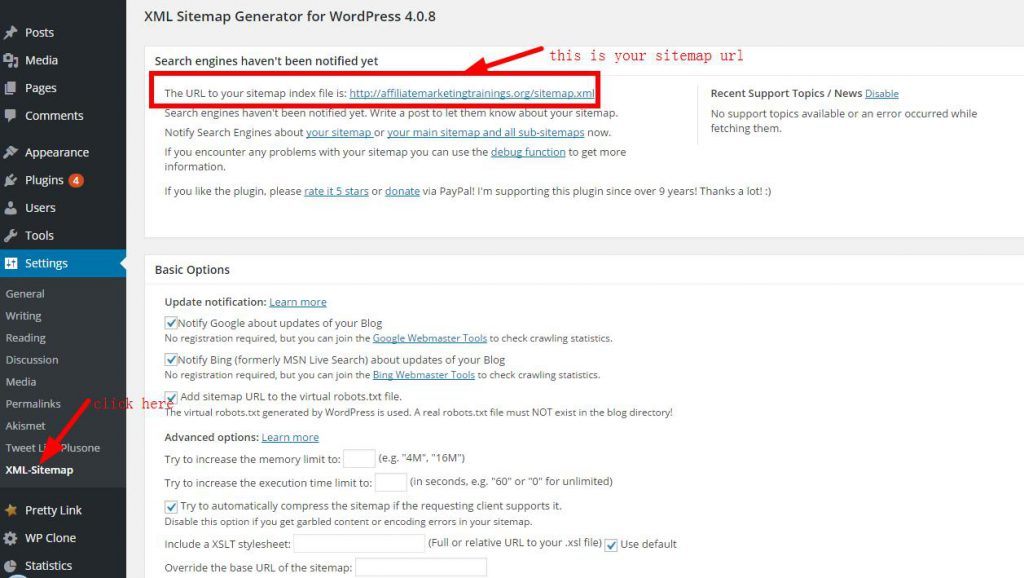
After installing and activating the plugin, check the “Setting” box and click “XML-sitemap” enter the plugin area. If you don’t know how to configure or select, just leave them default. At the top of this page, you will find your sitemap url. like this: http://yourdomain.com/sitemap.xml
For instance, My WordPress sitemap url is: https://affiliatemarketingtrainings.org/sitemap.xml
See imagine below:
The last work of this step is to click “update options” at the bottom of the page.
﹟3. Submit your sitemap to Google Webmaster tools
Before submit your sitemap to Google Webmaster tools, there are 3 steps that you have to complete: ( If you have done this before, please check the third part)
(1) Need a google webmaster account
If you have’t google webmaster tools account, please sign up here
( 2 ) Submit your website to google webmaster
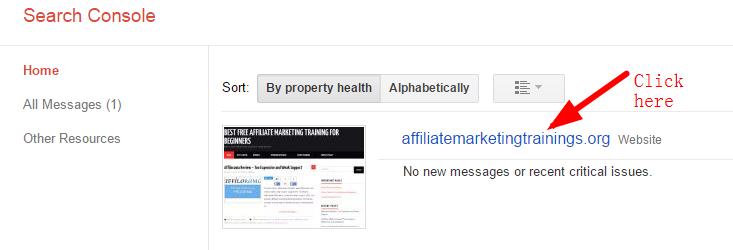
Firstly, you need to submit and verify your site to google webmaster. Don’t worry about it. It is very easy, just follow the instructions. The next steep is to click your website to enter google webmaster dashboard.
(3) Submit your WordPress sitemap to google webmaster
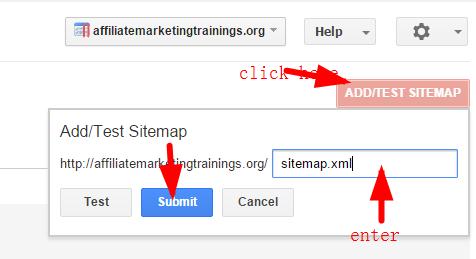
Once your site is verified by google, then you can submit your sitemap there. Find the “sitemap” button in the dashboard. see imagine below:
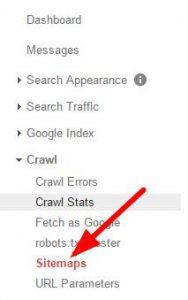
And you will see the “Add/test sitemap” at the right top of the page. Enter “sitemap.xml” and click “submit” button.
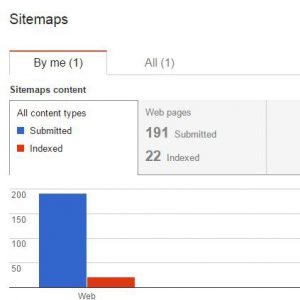
Your sitemap status will be displayed “pending”. About several hours, the “sitemap” item display “submitted and indexed quantities”. These two numbers is maybe different. Not all web pages can be indexed by google instantly. It will need some time, maybe several days, weeks…. That’s up to your domain date (website time ) and quality of contents.
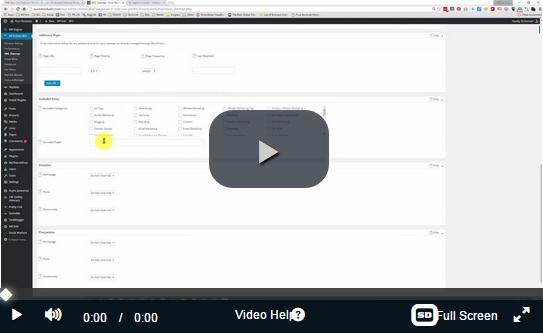
If you use all in one SEO pack plugin in your WordPress blog, you can use it to create a sitemap and submit to google webmaster tools as well. It is very simple too. You can check this tutorial video in Wealthy Affiliate or click the video below:
If you have any question or problem with this work, please leave your comment below, Ii will answer you ASAP.
Michael
