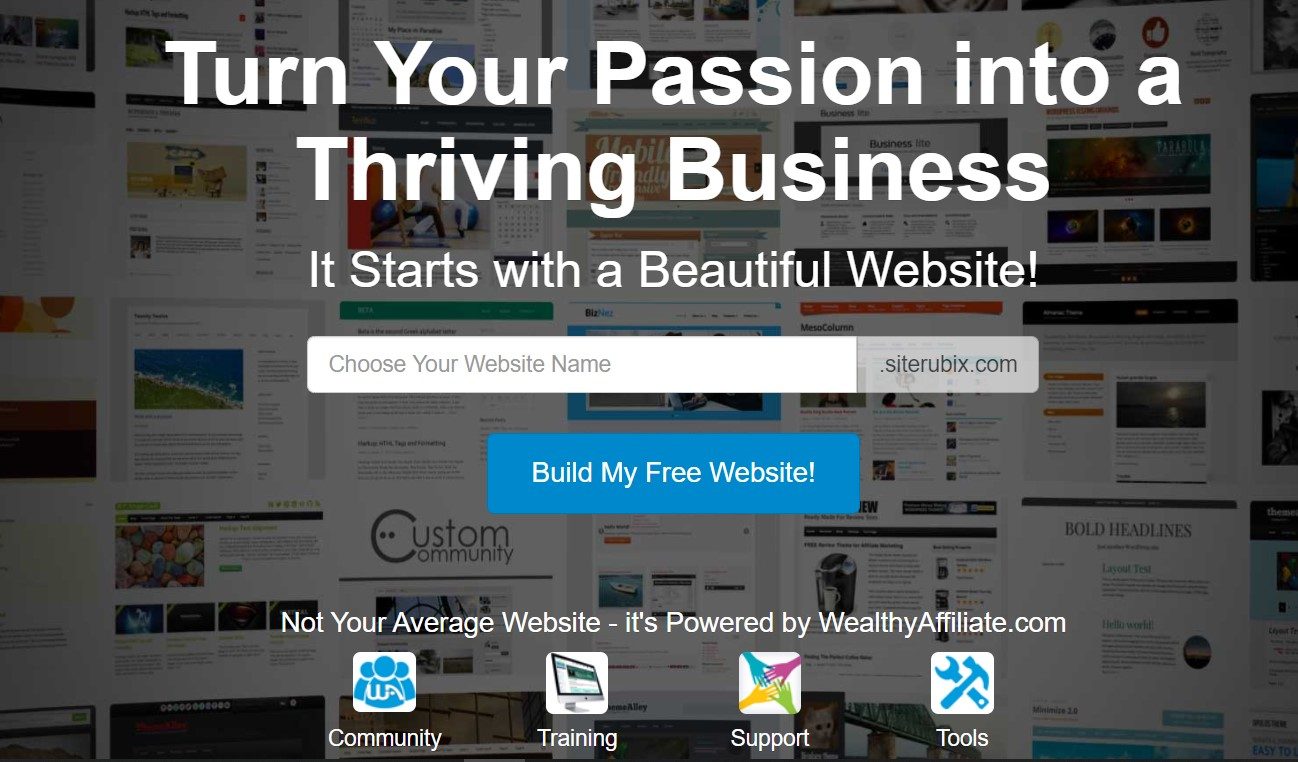
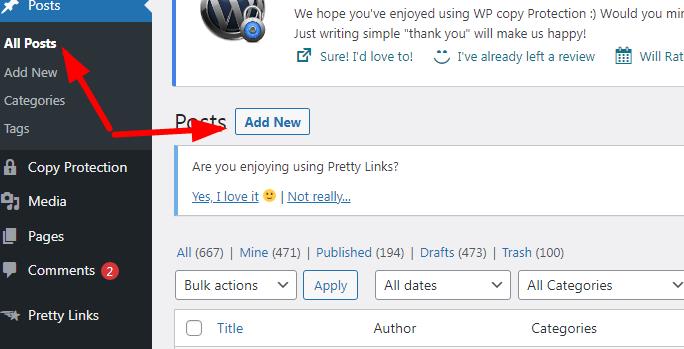
SiteRubix is a free WordPress site builder and hosting service and you can create a website under the SiteRubix.com domain for free.
Powered by WealthyAffiliate.com, SiteRubix provides you with the training, support, and tools to turn your creations into something truly valuable.
There are many excellent WordPress builders and hosting services online, is there anything special about Sietrubix? What is the difference between the Siterubix with others? Here are the reasons (All my sites are built with it):
Why Use Siterubix to Create a WordPress Site
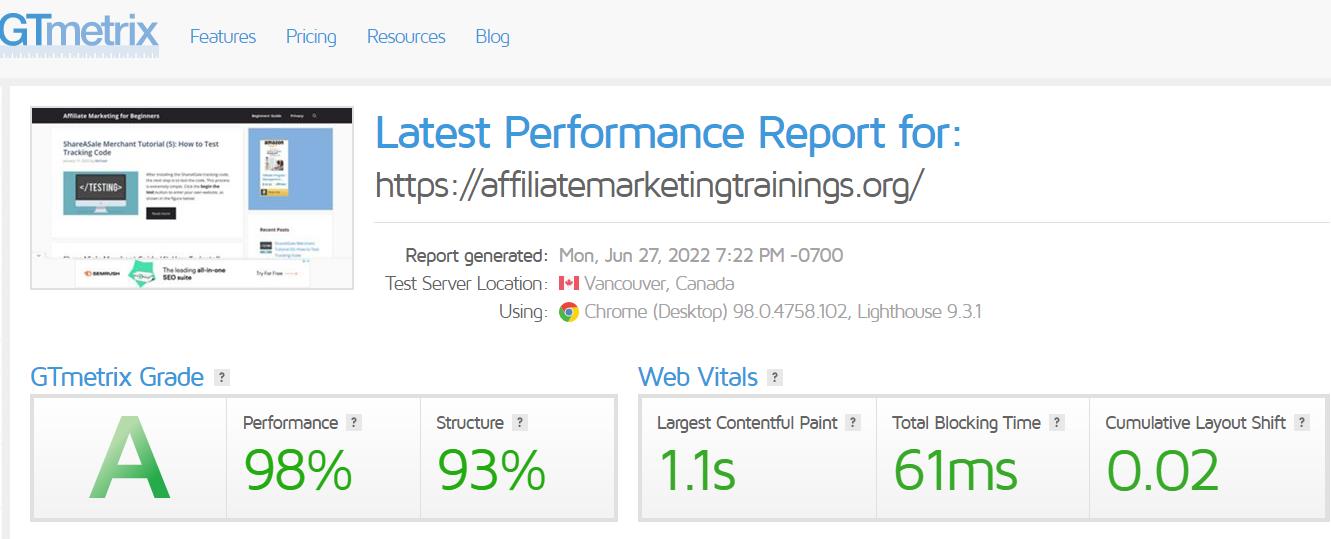
High Speed and Security
The WordPress hosting provided by Wealthy Affiliate is not mediocre, but it is actually keeping pace with mainstream hostings such as Bluehost and SiteGround. The following is the test result of this site.
Siterubix provides a “double hosting” service, that is to say, your site has full redundancy. Learn more.
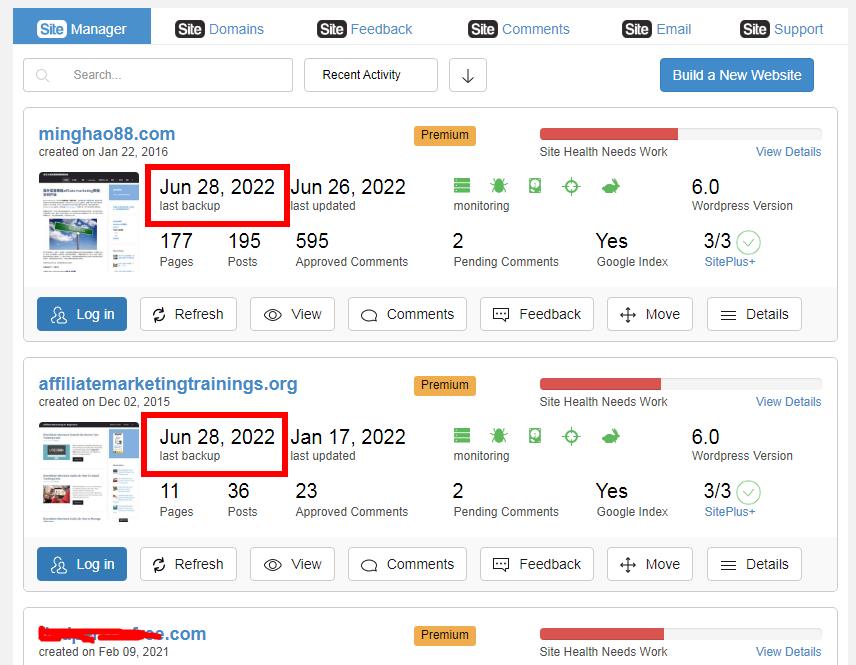
Moreover, Wealthy Affiliate provides daily backup services. Even if your site disappears, you can ask support to restore your site at once.
website unlimited Features
Thousands of professional designs for all sorts of niche website needs: browsing on tablets and mobile phones, different screen sizes.
learn more ( Comparison chart )
The Simplest and Easiest Site-Builder
Many platforms offer WordPress website building, but not all of them are free, fast, or easy. The reason why it is the easiest WordPress construction tool is that you needn’t build WordPress at all. The WP website is created in advance. You need just to choose a domain name and name the website.
Moreover, there are tons of WordPress tutorials, online business, keyword & SEO training courses, and tools. They are all free. You cannot find them in any hosting services.
Steps of Building a WordPress Site With Siterubix
Step 1 Create a Free Account
No credit card, bank card number, PayPal, etc. are required. All you need is an email address to register a free account.
This page gives you the outline of a website before you register a free account.
Step 2: Go to the WordPress Website Building Center
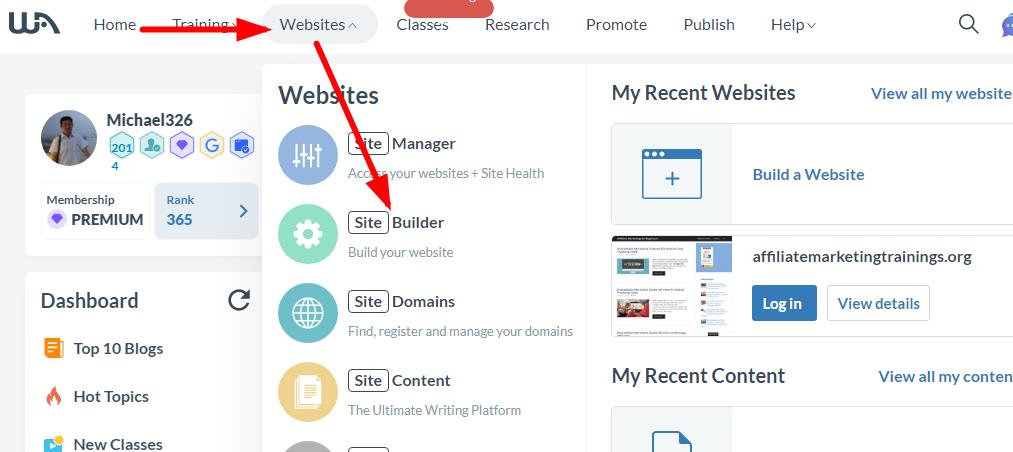
Enter your WA account, and you can see Site Builder in the top navigation bar, click Websites » Sitebuilder, or click the Build a Website button next to it directly, as shown below:
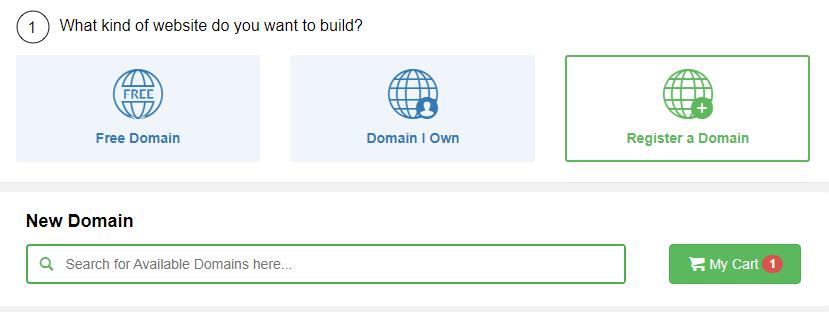
Step 3 Choose a Domain

There are three options:
Free Domain
Refers to the ***.siterubix.com, which is free, here is how to register
Domain I own
If you have your domain name, you can use it to build a site here.
Register a Domain
3 easy steps to register a domain name
Choose the first option without a penny.
Free Domain
I take the subdomain- myniche.siterubix.com as an example to demonstrate the entire construction process of building a WordPress website.
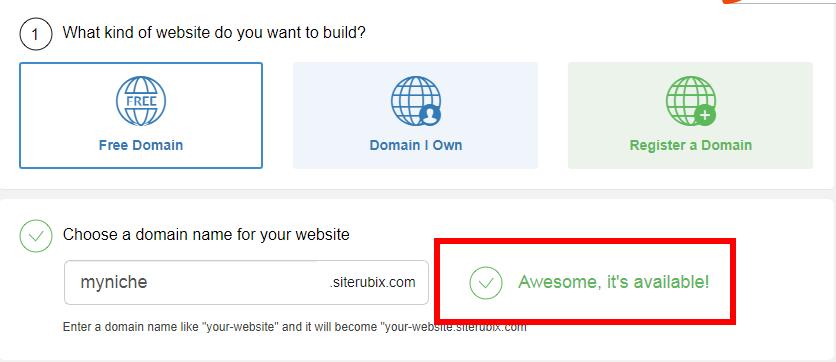
Select Free Domain, and enter “my niche” in the domain name bar, and the green tip displays on the right side: Awesome, it’s available! , indicating that this domain name is available for your site.
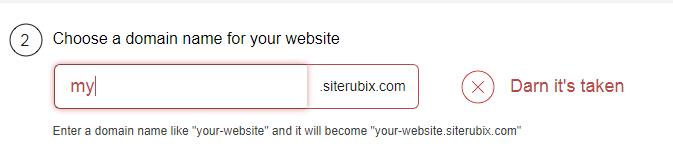
If the domain name is already taken by someone else, it is displayed in red, as shown in the picture below: Darn it’s taken.
Domain I own

If you have your domain name, but it is not in WA, you can transfer it to WA. The transfer process is straightforward, you apply for a transfer password from the original domain name registrar, then fill in the password in the box, and everything will be completed automatically (about 2-6 days), as shown in the following figure:

Free Training Video: How to Transfer a Domain Name to Wealthy Affiliate
Register a Domain
As an excellent domain name registrar, you can easily register 3 types of top-level domain names here: .com, .org, and .net.
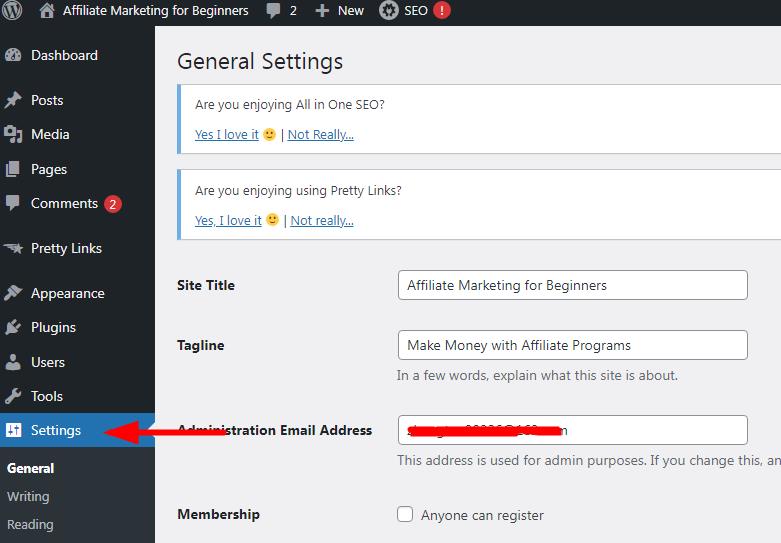
Step 4 Name Your Site
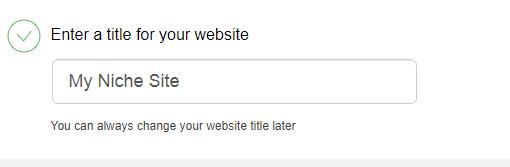
Give your website a name. This step doesn’t matter. You can name your site on the WP dashboard later.
Click Settings » General on the left to enter the settings page, as shown below:
Step 5 Choose a WordPress Theme
As a free membership, there are a few free themes to choose from; however, as a premium, there are probably more than 4,000 themes.
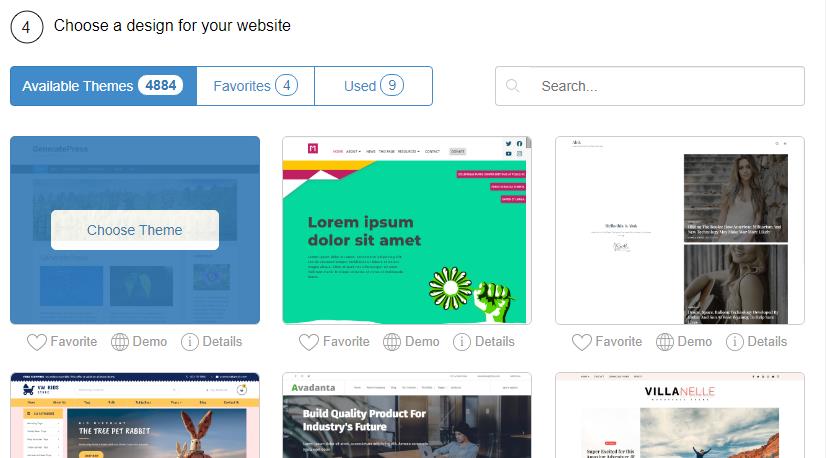
Choose a theme and enter the next step automatically.
Don't waste too much time in this step, you can change it at any time later (but if your site has the lots of contents and has been ranked on Google, don't change it, you may lose the ranking). At present, the GeneratePress theme is popular, suitable for many types, and it is also suitable for affiliate mareking websites. This site them is GeneratePress.
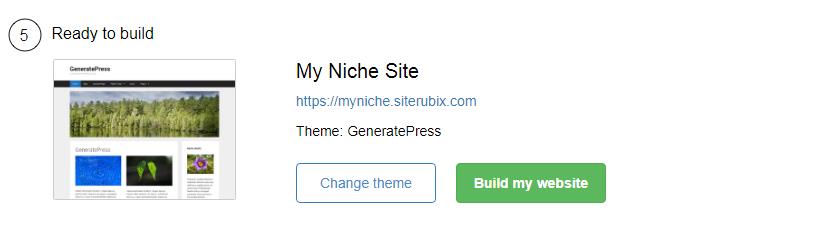
Click the Build My Website button to automatically generate a WordPress website.
Free Training Video: Building Your Website in 30 Seconds
How to Login to WordPress Admin Dashboard
3 methods to log in to your site:
- From your WA Account: This is what I use every day, very convenient.
- WP username and password login
- FTP login: professional use (uploading and downloading files), not recommended for novice users
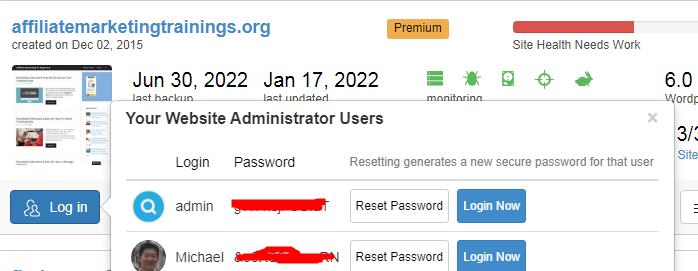
1. From your WA Account
Log in to your WA account with your username and password, and click Websites » manager at the top bar. All of your websites are listed here:
- Starter member:1 site
- Premium member:3 sites
- plus member: 10 sites
Click the Login button, then Log Now without entering a password and username.
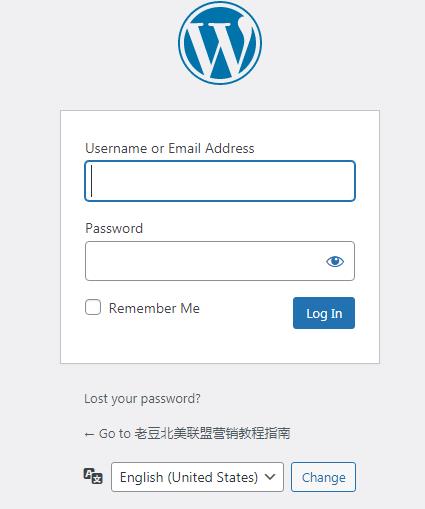
(2) Username/Email Address with password
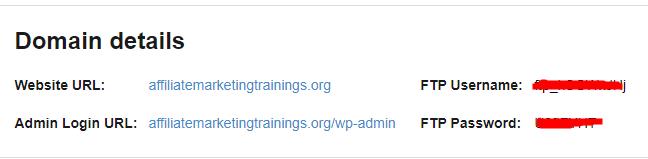
On this page ( yourdomain.com/wp-admin ), enter the username and password, which is the password shown in the screenshot above, as shown in the following figure:
(3)FTP
This requires an FTP tool, e.g. FileZilla. WordPress owners use it to upload or download files from sites. Generally, we usually don’t use it.
Create a free Semrush account to analyze your website
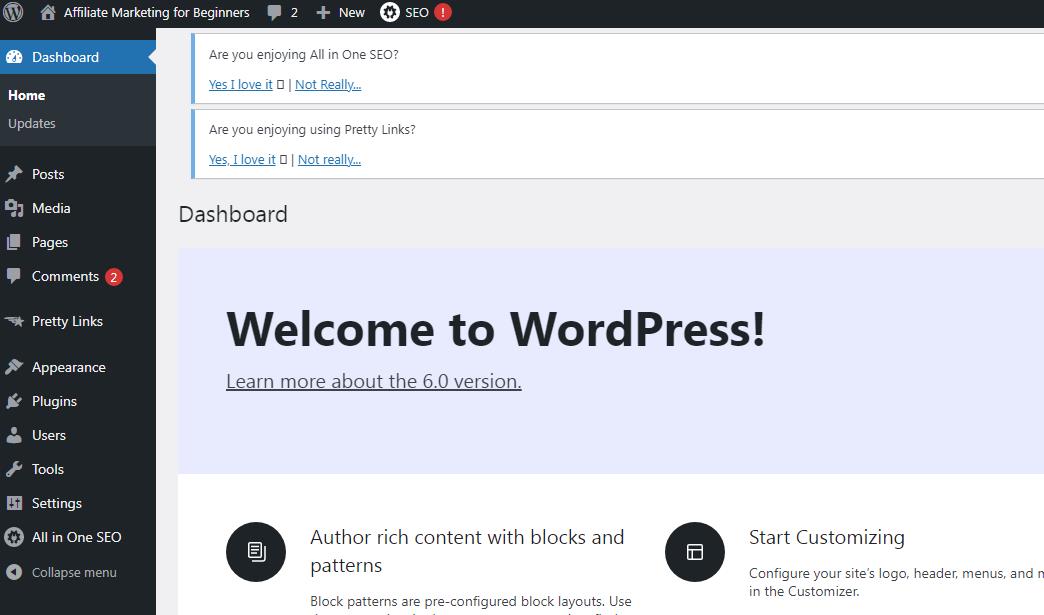
How to use WordPress Admin
After logging in according to the above methods, you enter the WP administrator dashboard. Here, you can write articles on post/page, manage plugins, themes (website appearance), etc. The function bar is on the left. The main areas are briefly described below.
WordPress plugin
Wealthy Affiliate will automatically install several necessary plug-ins for your website, such as an SEO plugin, image optimization plugin, etc. Others are installed according to your own website needs:
If you want to install a new plugin, you can click Add new on this page to enter the plug-in selection page.
Free Resources: SEO Guide: Everything a Beginner Needs to Know
WordPress Theme
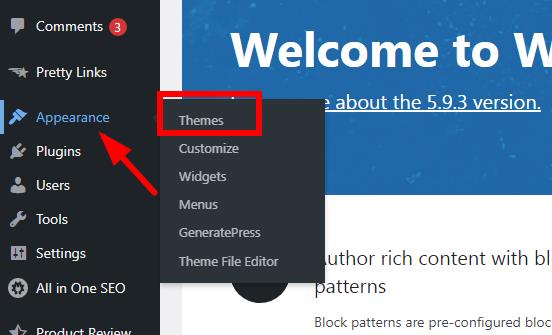
As mentioned earlier, if you are not satisfied with the theme you choose, you can change it at any time. How to change the theme:
Place the mouse on Appearance on the left bar, and then click the Themes button, as shown below:
After entering the wp theme area, click the add new button to enter the WordPress theme center. Here, you can browse all themes by subject, features, and layout, as shown in the following figure:

Free Training Video: How To Choose A Theme By The Features
Create content ( post or page)
Using the steps above, your website should be set up in about twenty seconds. However, this is just an empty website without content (click here to see the sample WordPress website, except for the Hello World demo post, there is no other content), you need to create content in the form of a page or post.
Free Training Video: How to Create Content That Ranks In Google
Let’s take a post as an example to demonstrate how to create your first WordPress article.
Hover over the post button and click Add new, as shown below:

Or click the post button to enter the posting page, and then click the add new button, as shown below:
post edit page method 2
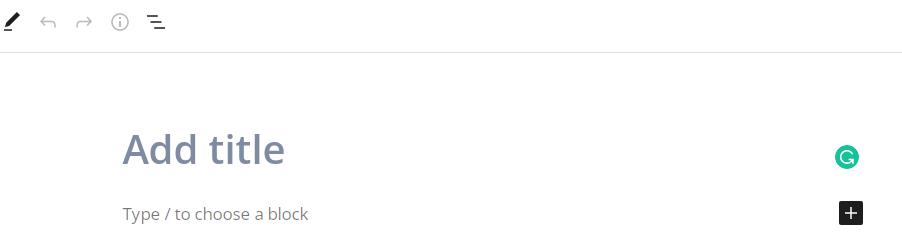
1. Post/Page Title
Enter the title in the box, the default font size of the title is H1, as shown in the following:
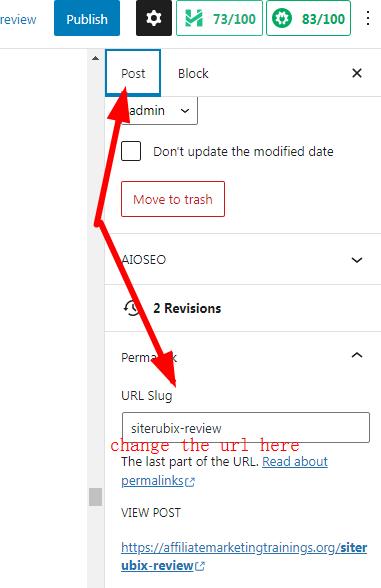
What you need to know is that the post URL automatically defaults to the article title. Of course, you can change the URL to others manually. The change method is to enter the relevant URL in the permalink on the right, as shown in the following figure:
2. Title in the content
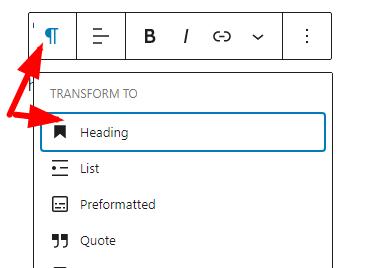
Using appropriate headings (subheadings) in your content will help readers understand and keep your writing organized. Since the main title of the article is H1 by default, the subtitles in the article start from H2 to H6. The method of adding subtitles is as follows:
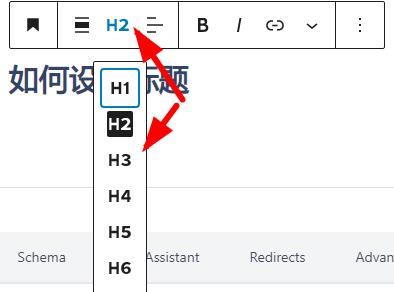
Entering the title text, click on the left of the toolbar above the block, select Heading, and convert it into a title, as shown in the following figure:
The H2 title usually defaults directly. To change the font size, click H2 and select another font size, as shown in the following figure:
Tip: Don't add titles indiscriminately. Too many titles are not good for SEO. Sometimes, black and bold fonts are also very good for SEO.
3. Add an Image
Inserting pictures in the right position of the article can not only combine pictures and texts to make your content more readable but also help SEO. There are several ways to add an image, the easiest way is to click the plus sign on the left. As shown below:

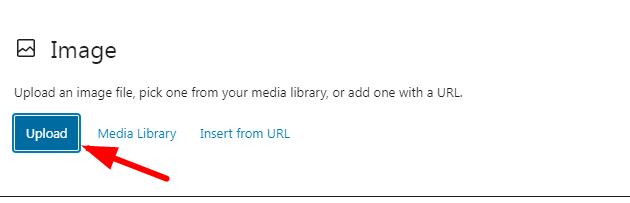
After clicking +, there are 3 types of adding a picture:
- upload: If the image is on your computer, select Upload to upload it to your website
- media library: If pictures have been uploaded to the website, just select it from the website gallery.
- insert from URL: You can also directly enter the URL of the image. If the image is not in your media library, try not to do this. Because if the original image doesn’t exist, it will show an empty image in your post, which is not good.
Basic SEO
According to the above method, the article is completed, but it has not been published yet, there is still some basic SEO work to be done. This job is done by using the SEO plugin for your WordPress site. (However, the free WP site version does not have this feature)
The purpose of SEO, to put it simply, can be regarded as two: one is to be indexed by search engines, and the other is to obtain a good ranking in the search results to obtain high-quality traffic.
Related Tutorial: The Complete SEO Guide for Beginners
SEO Plugin
Let’s take ALL in One SEO plugin as an example.
At the bottom (or top left ) of the post/page, you will see various options for the SEO plugin:

In this section, they are all invisible elements on the page. They are just for search engines. When people use keywords to search on Google, they will see your site on the result pages, as shown below:

- Snippet Preview:
- Post Title
- Meta Description
- Focus Keyphrase
- Additional Keyphrases
If you don’t know how to fill in, just leave them black. The plugin will complete this work automatically.
This SEO plugin will score your website. If the score is green, it means that the SEO effect of the article is good. If it is in other colors, it needs to be improved and the reasons are given.
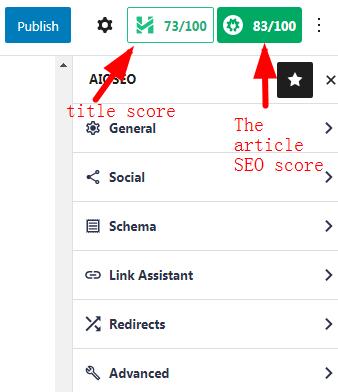
This plugin flags the key SEO points you haven’t done.
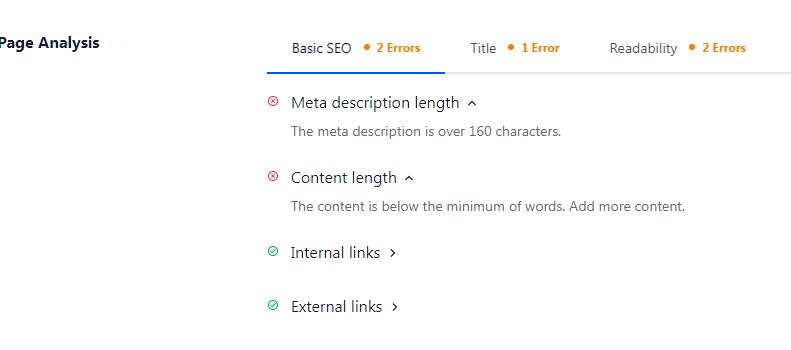
According to the rating criteria of the plugin, you know: an article must at least have internal links, external links, and pictures. Without these, the article will not have the most basic SEO optimization.
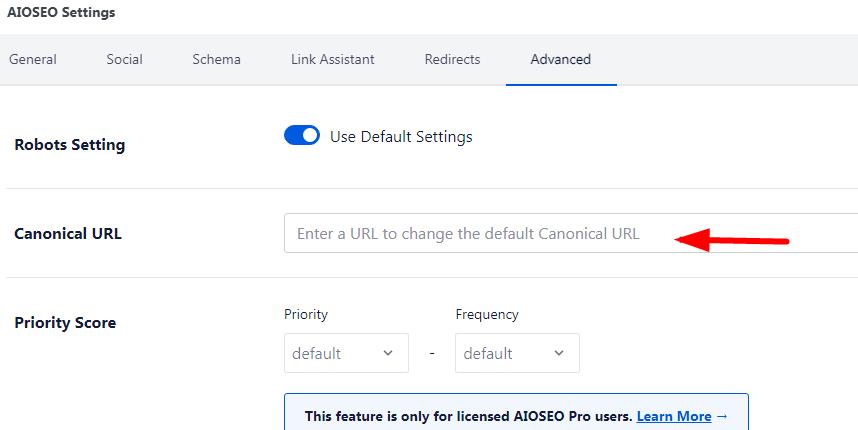
Canonical URL
A canonical URL is the URL of the page that Google thinks is most representative from a set of duplicate pages on your site. For example, if you have URLs for the same page (
Google SEO Guideexample.com?dress=1234andexample.com/dresses/1234), Google chooses one as canonical.
At the bottom of the article, select the “advanced” of the plugin (the plugin can also be displayed in the action bar on the right), and copy the article URL here, as shown in the following figure:
Add your site to Search Engines (Google)
Google is the most important search engine. So I take it as an example:
Firstly, you need to register a Google search console account.
It can help you measure your site’s search traffic and search rankings, troubleshoot issues, and make your site stand out in Google search results.
What Is The WordPress Toolbar?
The WordPress Toolbar, formerly known as the Admin Bar, is a small bar at the top of your screen that’s present both when viewing the live version of your website and when browsing the WordPress admin panel (assuming you’re logged in to WordPress).
Regular visitors to your site will not see the Toolbar. But if you’re logged into WordPress, you’ll see a floating bar like this on every page on your site:

Now, your WordPress site is completed. The content should follow a general direction, which is the so-called niche, and then add your products, join the affiliate network, and apply for the affiliate products/programs so that your website will gradually move towards a profitable path.